Upgrade Your Storage to SPATIUM SSDs – Step by Step Guide
22-12-05
NEWS
Upgrade Your Storage to SPATIUM SSDs – Step by Step Guide
It is always exciting to build a new PC or to upgrade one of the key components in the system that you rely on every day. Inevitably, to transfer your important data or operating system from the old platform to a newly built or partially upgraded one with a replaced storage device becomes important when a seamless transition is required with a lossless data transfer.
Coming with the new storage product series: SPATIUM, MSI is providing an advanced software solution with data backup built into MSI Center. MSI has collaborated with Actiphy, a world-leading data backup solution, to allow users who purchase and install MSI SSDs into their PC system the ability to create backups and prevent loss of data.
Today, we would like to go through the steps to show you how to back up the important data, transfer them into the newly upgraded SSDs in your system with the easy-to-use features of backup, and restore in MSI Center.
Getting Started
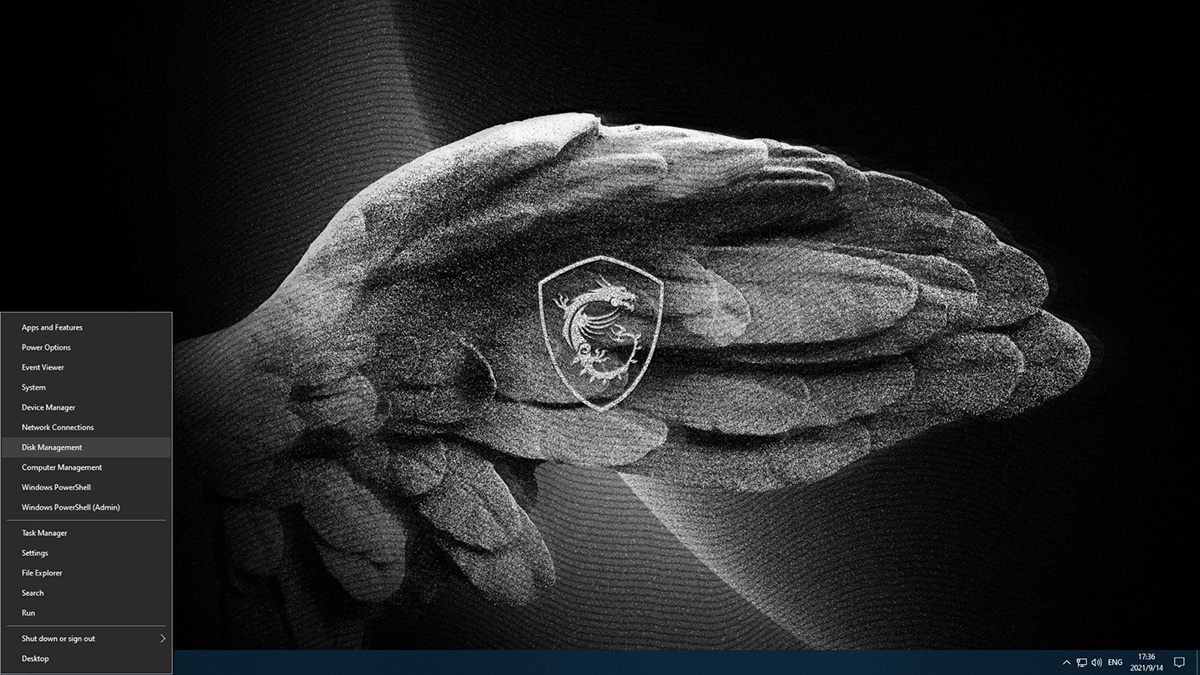
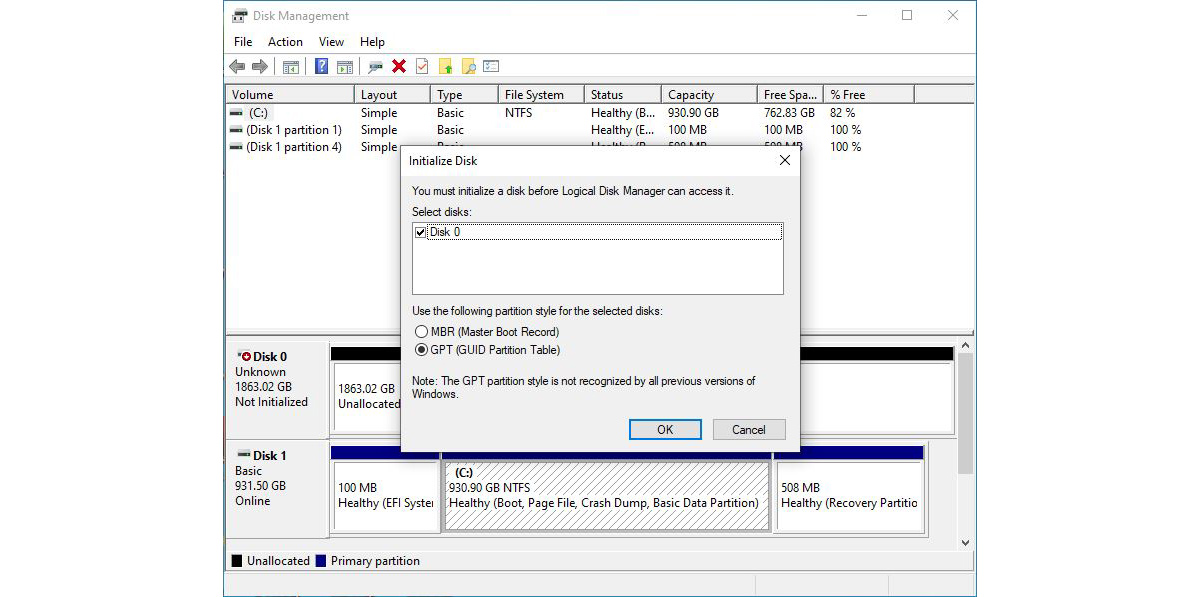
• Please ensure your MSI SSD is physically installed into your system and initialized & formatted in Disk Management before starting the process. Without the MSI SSD installed the backup & restore functionality will not be available in MSI Center. (To find Disk Management in Windows 10, right-click on the Windows icon. Disk Management is one of the options in the menu.)
• Please also make sure you have a 3rd drive available where the image of the source drive will be stored. This is necessary because the image that we are going to create cannot be stored on either source or destination drives. The capacity of both the 3rd and destination drives must at least match or exceed the capacity of the image.
• Download and install MSI Center and make sure the version you are going to install is 1.0.31.0 or later.
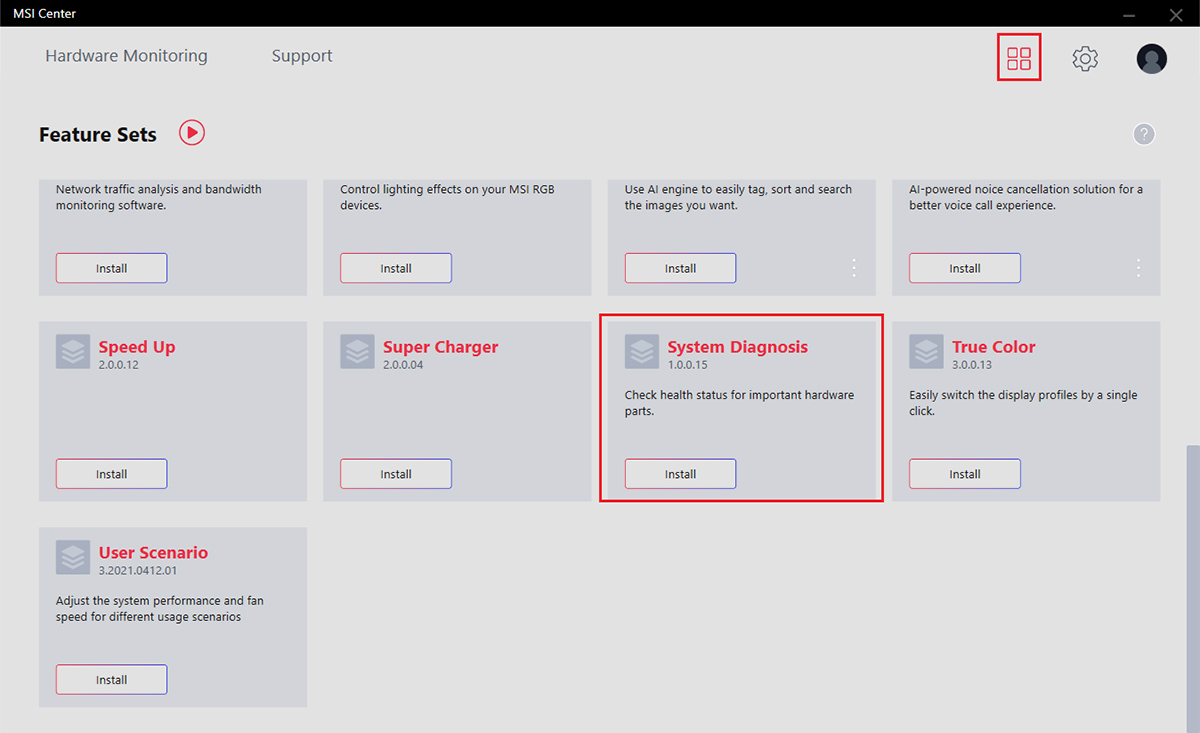
• Launch MSI Center and find & install the System Diagnosis in Feature Sets. Press Open once the installation is completed.
For the Backup
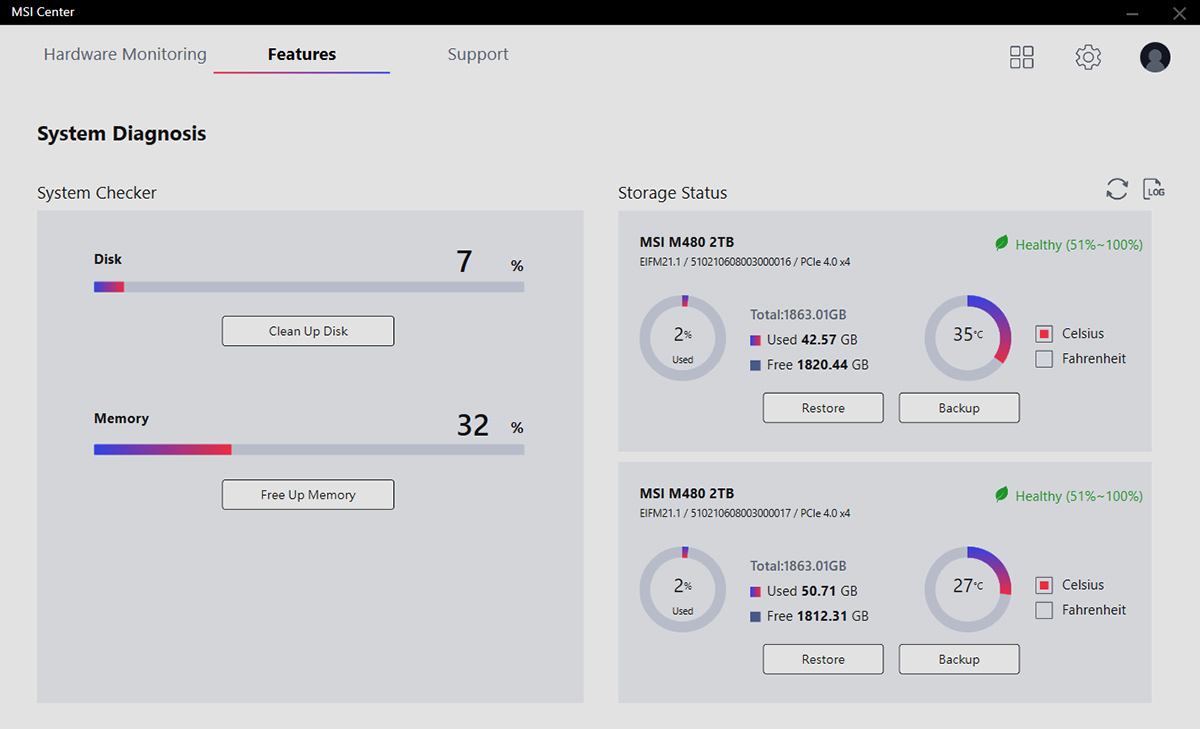
Step 1: Find System Diagnosis at the tab of Features.
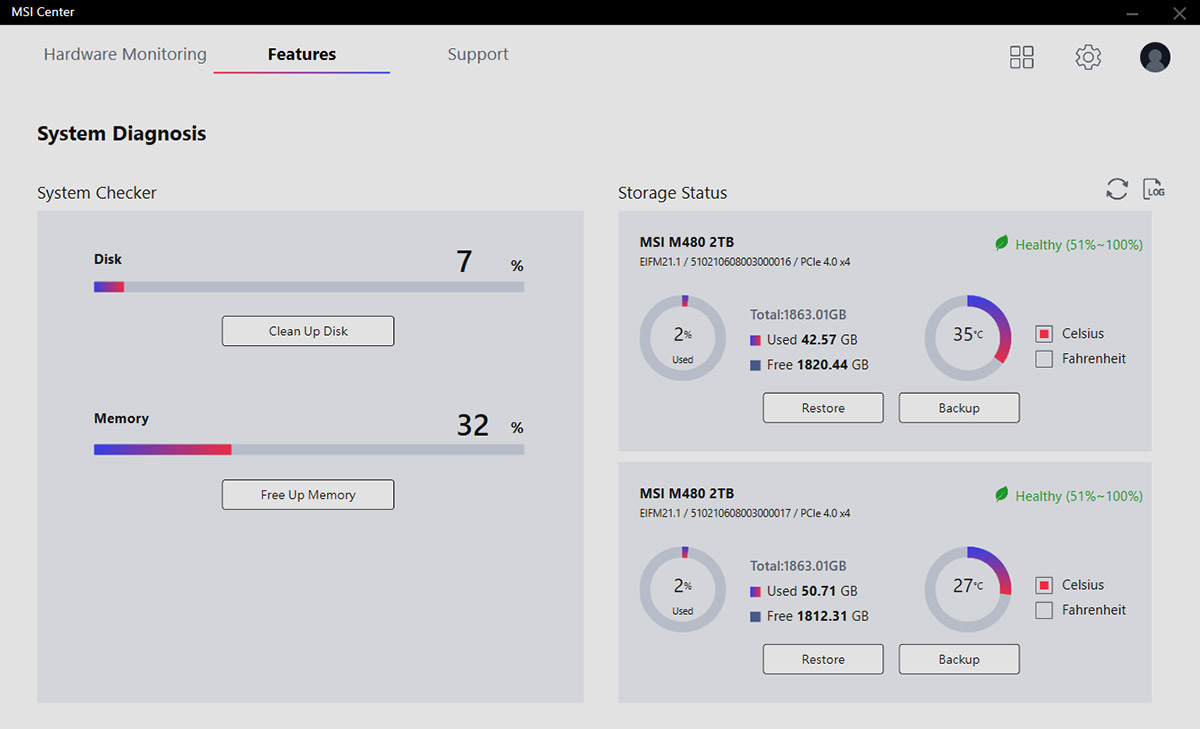
Step 2: Find the drive that you want to back up, and click the “Backup” button below the drive health information of the selected storage device.
Step 3: Under File Name, enter the name you wish to give your image, then click “Select” under Select Save Path to choose the location where the image will be stored.
Step 4: Choose the Compress Speed and Encryption. If you are not sure what to choose, we recommend choosing “Fast” for Compress Speed and “None” for Encryption as default values.
Step 5: Check the Password Protection if you would like to protect the image with a password. (Optional)
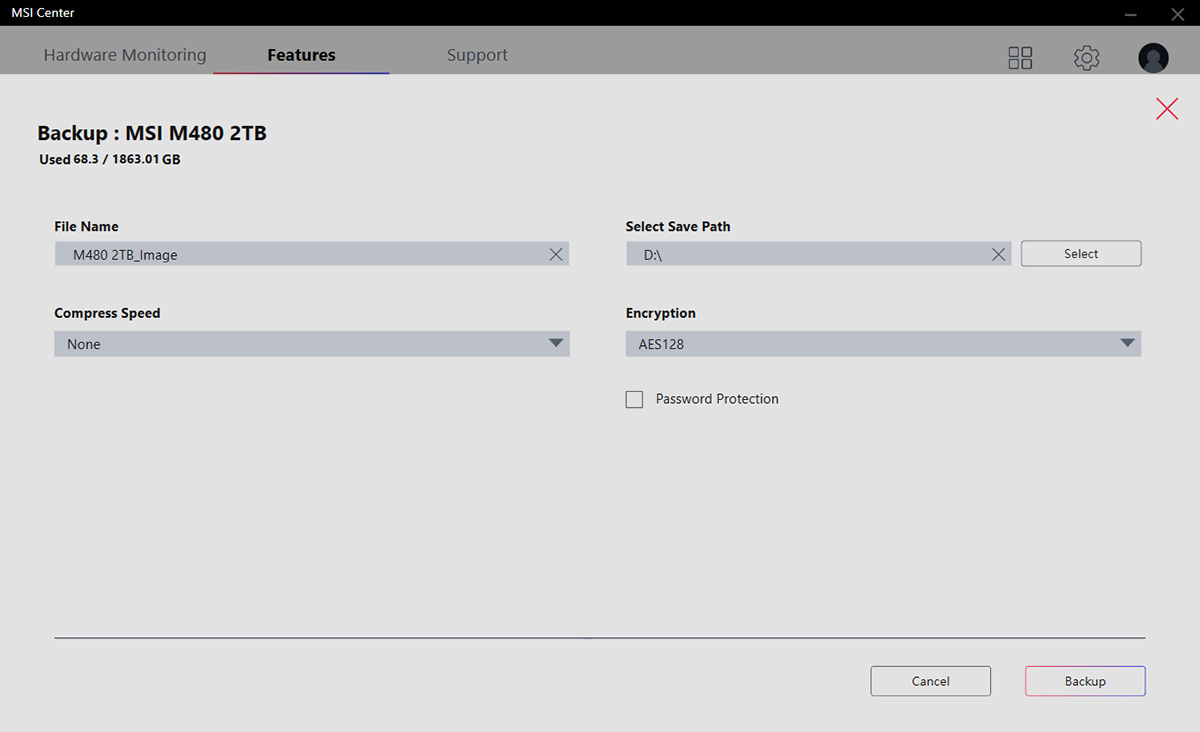
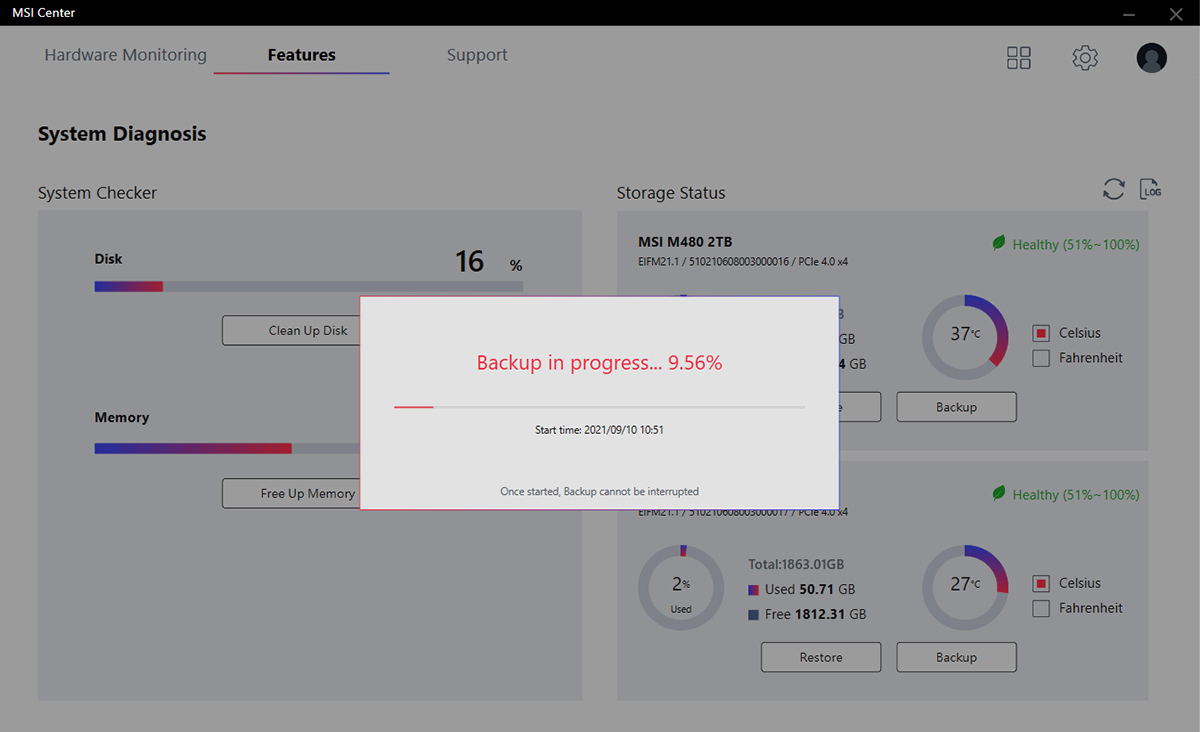
Step 6: After completing the above steps, the Backup button at the bottom should become available. Click it to start the process, and a progress bar should appear.
Step 7: Once the backup image is created you should see a notification saying “Backup Successful”. Click Ok to finish the backup process.

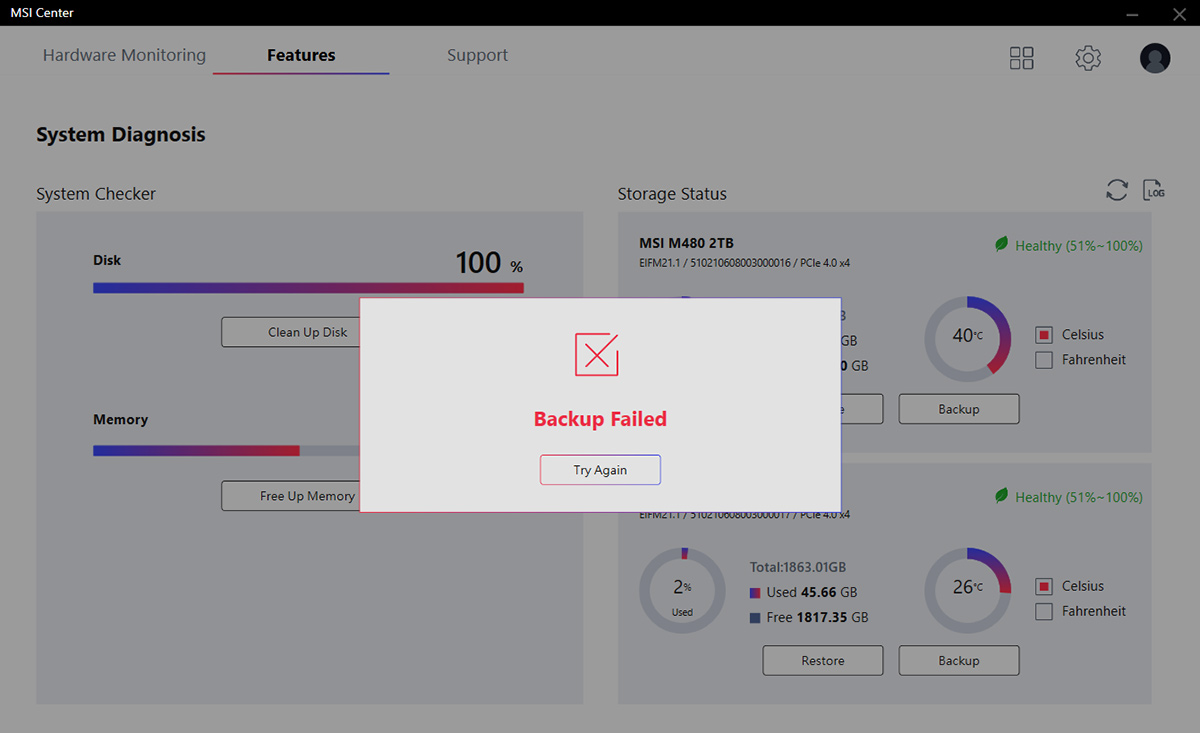
Note: If you get a notification telling you the backup has failed, please try again from Step 2. Meanwhile, what you can also do is to close unnecessary programs or reboot the system before trying again.
For the Restore
Step 1: Find System Diagnosis at the tab of Features.
Step 2: Find the drive that you want to restore the image onto, and click “Restore” below the destination storage device.
Step 3: Make sure you have selected the right destination drive and click “Restore” when the warning pops up to remind you that all data on the disk will be erased.
Step 4: Select the image that you wish to restore onto the destination drive.
Step 5: Click Restore on the bottom right. A progress bar will show once the restoring process has started.

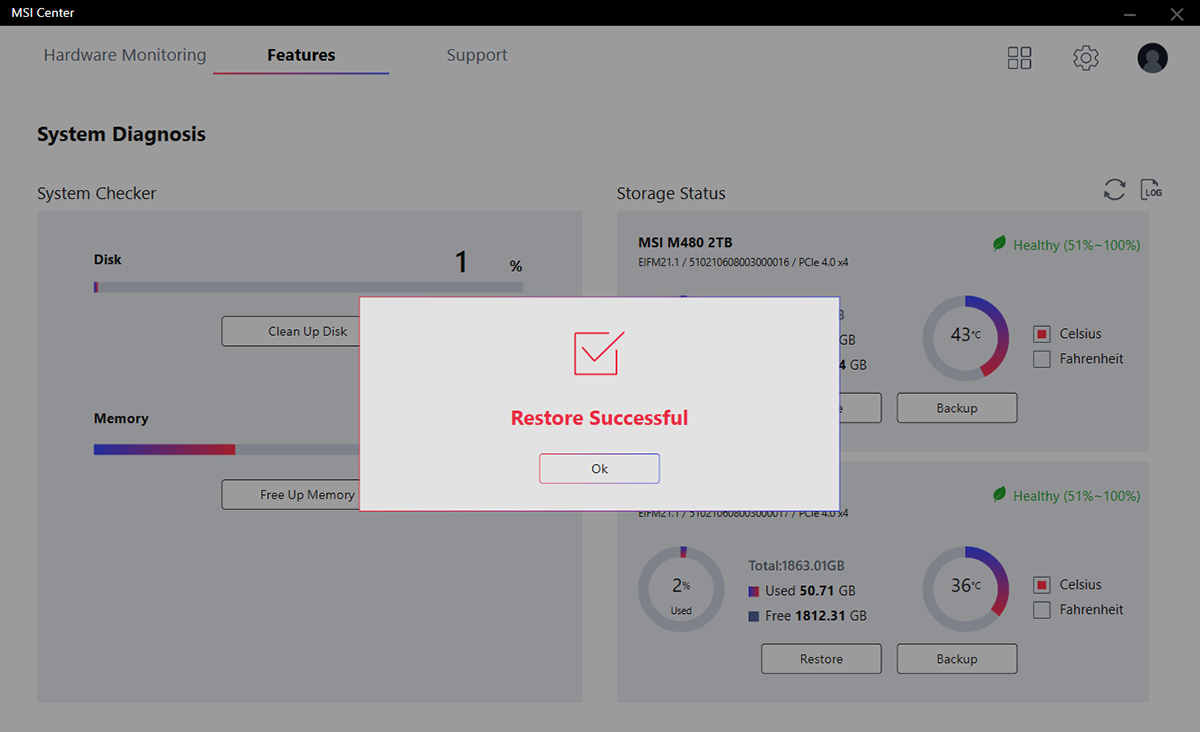
Step 6: Once the restore process has completed you should see an notification saying “Restore Successful”. Click Ok to finish the backup process.
Step 7: Reboot your system to select the newly transferred SSD as the boot disk or power down your PC to remove the old storage device from your system to enjoy the fast speed of your freshly installed SSD.
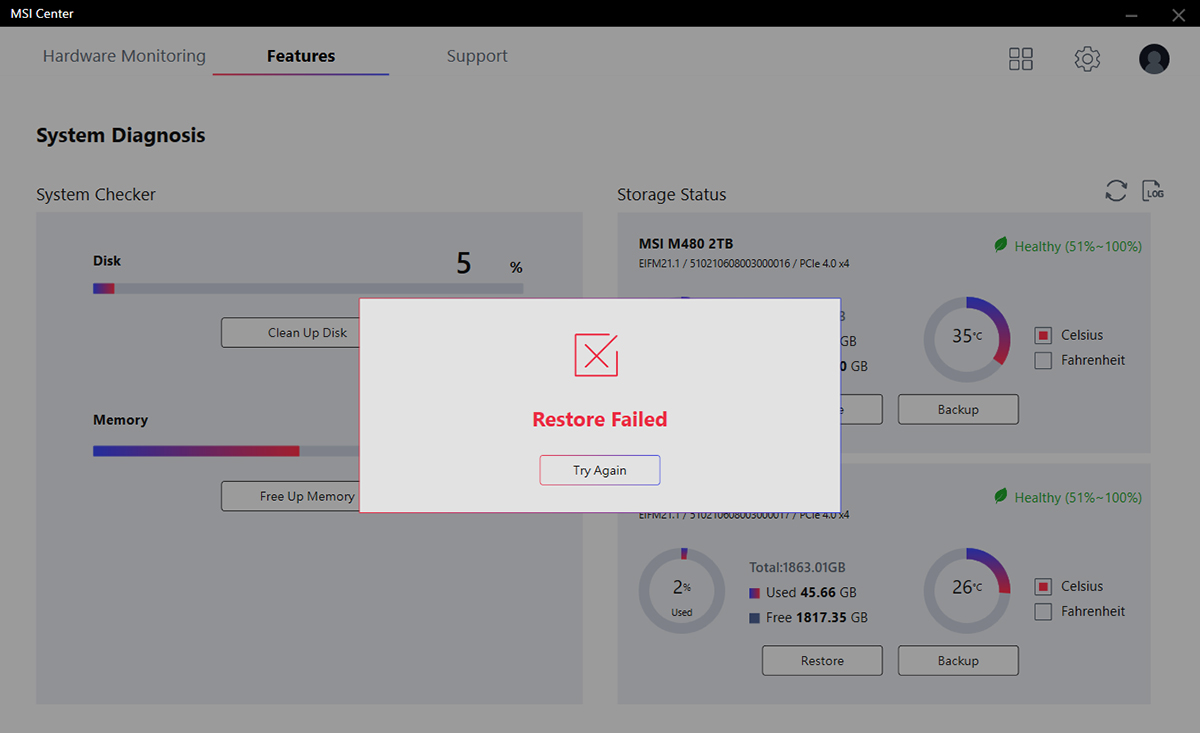
Note 1: If you get a notification telling you the restore process has failed, please try again from Step 2. Sometimes a system reboot can help. If all else fails, please try to redo the backup and try to restore from the new backup image.
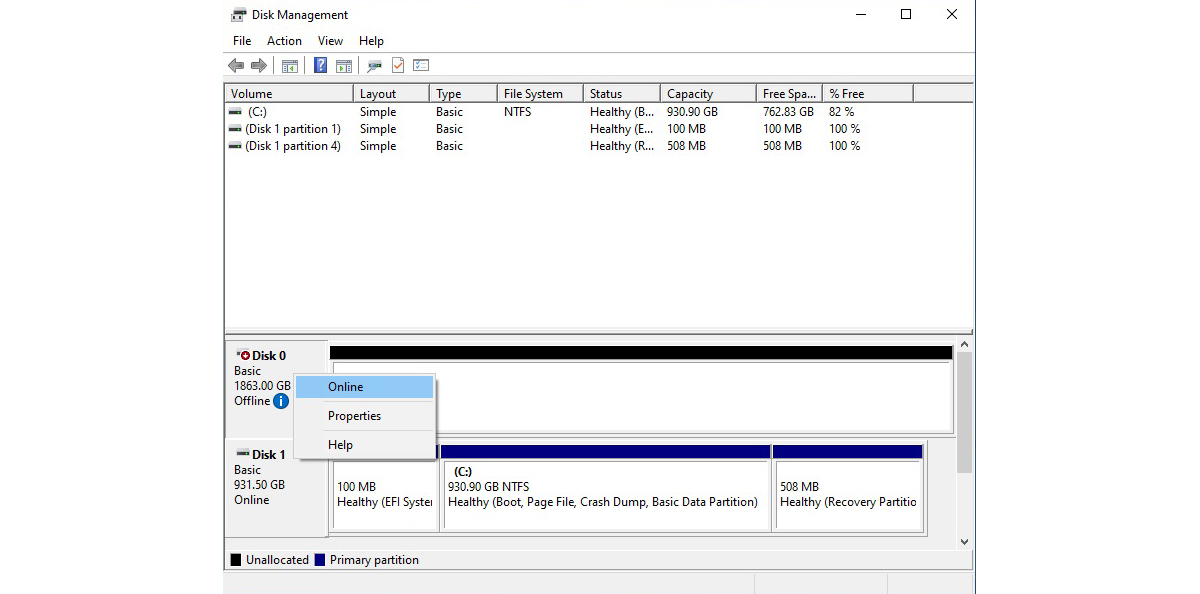
Note 2: If you cannot find the disk that is just restored, open Disk Management and try right-clicking the disk, and select Online. (To find Disk Management in Windows 10, right-click on the Windows icon. Disk Management is one of the options in the menu.)
Nice to know about Storage Features in MSI Center
While using the MSI Center, the user can see comprehensive information regarding the SSD status including drive health, used capacity, and current operating temperature. Besides, the Clean Up Disk can free up storage on the devices by deleting unnecessary data.

Compatible Models
SPATIUM M480 HS https://www.msi.com/Storage/SPATIUM-M480-PCIe-4.0-NVMe-M.2-HS
SPATIUM M480 https://www.msi.com/Storage/SPATIUM-M480-PCIe-4.0-NVMe-M.2
SPATIUM M470 https://www.msi.com/Storage/SPATIUM-M470-PCIe-4.0-NVMe-M.2
SPATIUM M390 https://www.msi.com/Storage/SPATIUM-M390-NVMe-M.2
SPATIUM M370 https://www.msi.com/Storage/SPATIUM-M370-NVMe-M.2
M480 https://www.msi.com/Storage/M480-PCIe-4.0-NVMe-M.2
M471 https://www.msi.com/Storage/M471-PCIe-4.0-NVMe-M.2
M470 https://www.msi.com/Storage/M470-PCIe-4.0-NVMe-M.2
M372 https://www.msi.com/Storage/M372-NVMe-M.2
M371 https://www.msi.com/Storage/M371-NVMe-M.2
M370 https://www.msi.com/Storage/M370-NVMe-M.2